

An indoor playground is built for one specific room. Soft-contained play structures are designed around your floor plan and ceiling height, then assembled on site from frames, platforms, padding, netting and slides. Knowing what happens at each stage helps you prepare the space, plan your opening date and avoid surprises.
This guide follows an indoor installation from the first room survey to the final walkthrough, including what you need to have ready before the crew arrives.
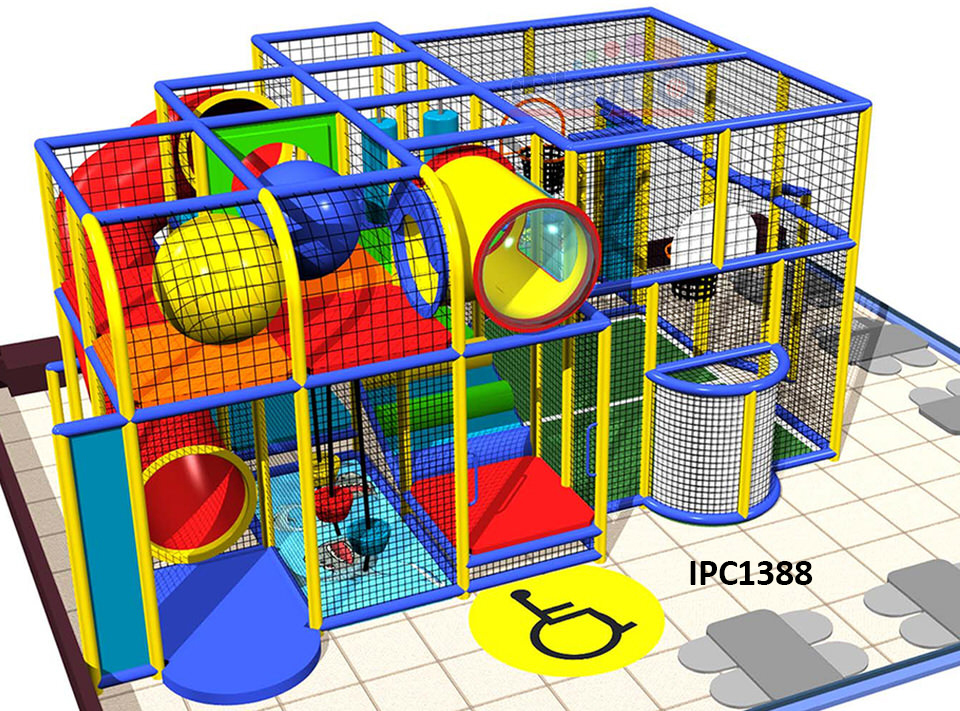
Step 1: The Room Survey
Indoor projects start with accurate measurements, because the structure is built to fit the room rather than adapted to it later. A good survey records:
- Floor dimensions, including alcoves, columns and anything else that interrupts the open space.
- Clear ceiling height across the whole room, measured to the lowest obstruction: beams, ductwork, sprinkler heads, light fixtures and ceiling fans.
- Doors, windows and emergency exits, and the routes to them that must stay clear.
- The floor itself: whether it is a concrete slab, what covers it and whether it is level.
- Delivery access: door widths, elevators, stairs and where parts can be staged.
If you are still choosing a building, share its floor plan early. Ceiling height in particular decides how many play levels the structure can have, so it can make one space a much better fit than another.
Step 2: Design Around the Ceiling and the Layout
With the survey in hand, the structure is designed in 3D to make the most of the room. Ceiling height sets the number of levels and the height of the tallest slide, and the floor plan decides where the entry, the exits and any separate areas sit. This is also when theming is chosen, so the colors, panels and graphics are planned as part of the structure rather than added afterward. Our theming options are designed together with the play structure for this reason.
Businesses that serve very young children often give them a dedicated indoor toddler play area, set apart from the main structure, so toddlers can play away from faster, older kids. Building and fire codes vary by location, so share the design with your local building and fire officials before installation begins. Their requirements can affect materials, exits and layout, and it is far easier to adjust a drawing than a finished structure.
Step 3: Prepare the Space Before the Crew Arrives
Installation goes smoothly when the room is ready. Before the crew arrives, plan for:
- A clean, empty room, with other trades such as painting, electrical and flooring either finished or scheduled around the installation.
- Power for tools and lighting good enough to work by.
- A staging area for crates and boxes close to the play area.
- Someone on site who can make decisions and answer questions during the installation.
- If your business stays open, a plan for keeping customers and staff out of the work area.
Step 4: Assembling a Soft-Contained Structure
A soft-contained structure goes up in layers, and the order matters:
- Frame: the steel frame is laid out, squared and leveled, then secured as the design specifies.
- Decks and platforms: the play levels are fitted into the frame at their designed heights.
- Padding and covers: frame members are wrapped in foam padding with protective covers, so children are not exposed to bare metal.
- Safety netting: netting encloses the structure. This is what makes it soft-contained: children stay inside the play area on every level.
- Slides and play events: slides, formed from molded polyethylene tubes and made to their deck heights, are fitted along with climbers, crawl tunnels and activity panels.
- Theming: themed panels and graphics go on last, once the structure is complete.
Flooring around the structure, often padded matting, is then fitted to the finished layout so there are no gaps at entries and slide exits.
Step 5: Final Inspection and Handover
Before the first child climbs in, the installed structure is checked against the design and for safety: fasteners tight, netting secure with no gaps, padding complete, slides seated properly, and entry and exit routes clear.
Handover is also the time to learn what your staff should check every day, such as netting, padding, loose fasteners and cleanliness, and how to clean each surface without damaging it. Write those checks into a daily opening routine. Once you are open, periodic professional checks keep the play area safe as it wears. Our playground safety inspections provide a written report and a repair plan.
Frequently Asked Questions
What ceiling height does an indoor playground need?
There is no single minimum, because the design adapts to the room. Lower ceilings suit single-level structures and toddler areas, while taller rooms allow multi-level structures with longer slides. Send your measurements and the structure can be designed to fit.
Can an indoor playground be installed while our business is open?
Sometimes, if the work area can be fully separated from customers and staff. Discuss it during planning so the schedule and the separation are agreed before the crew arrives.
Who should we tell before the installation starts?
Your landlord, if you lease the building, and your local building and fire officials, who may need to review the plans. Telling them early avoids delays once the equipment has arrived.
Plan Your Indoor Playground with A-OK Playgrounds
Send us your floor plan and ceiling height, and we will help you design an indoor play space built for your room. Call 512-826-8800, email [email protected] or request a quote. Digital catalogs are available on request.